
|
Today was the 2nd day for the 3 day-Nerikiri Basic Course. Yesterday we made anko and nerikiri dough from scratch. Today, we made spring and summer motifs. Tomorrow, we will be doing autumn and winter motifs. The Nerikiri Basic Course will cover the basic techniques that are used in making wagashi. Since this will be a private lesson or semi-private lesson with 2 participants max, I will make sure you will acquire the technique before you finish the course. For more details on this course, please check this page. 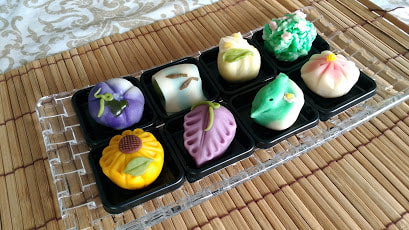
0 Comments
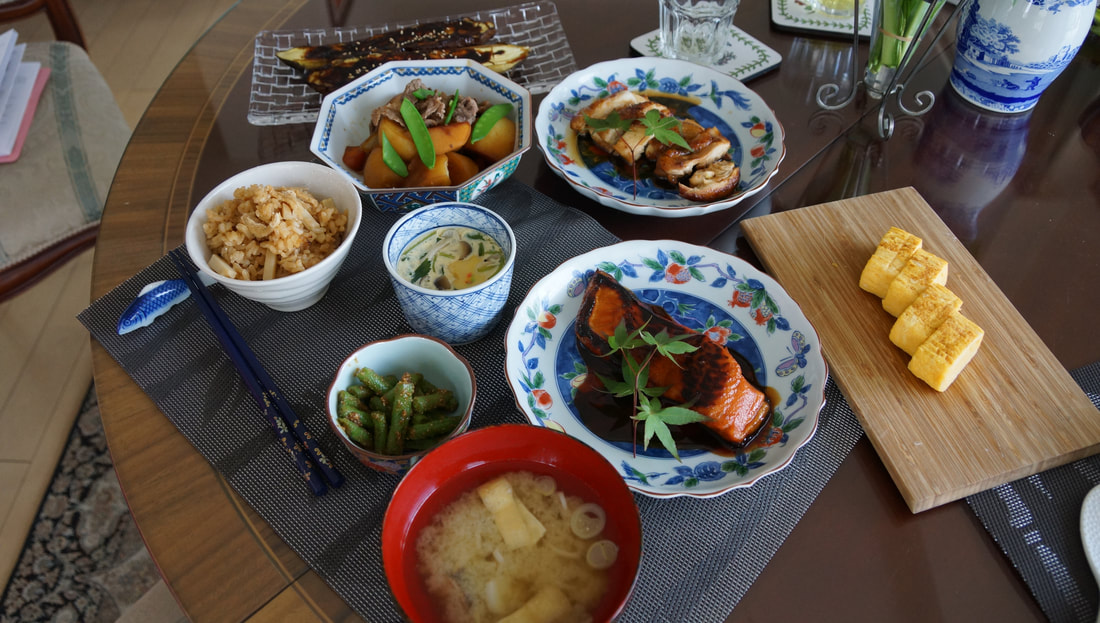
This week I will be holding a intensive cooking course for a charming aspiring chef from France. This is a private class that will teach how to make all the popular Japanese dishes. The first day started with a supermarket tour and a lecture on Japanese cuisine. We then started to cook, starting with the basics, washing and cooking Japanese rice and making dashi (fish stock). In the end we made 11 dishes;
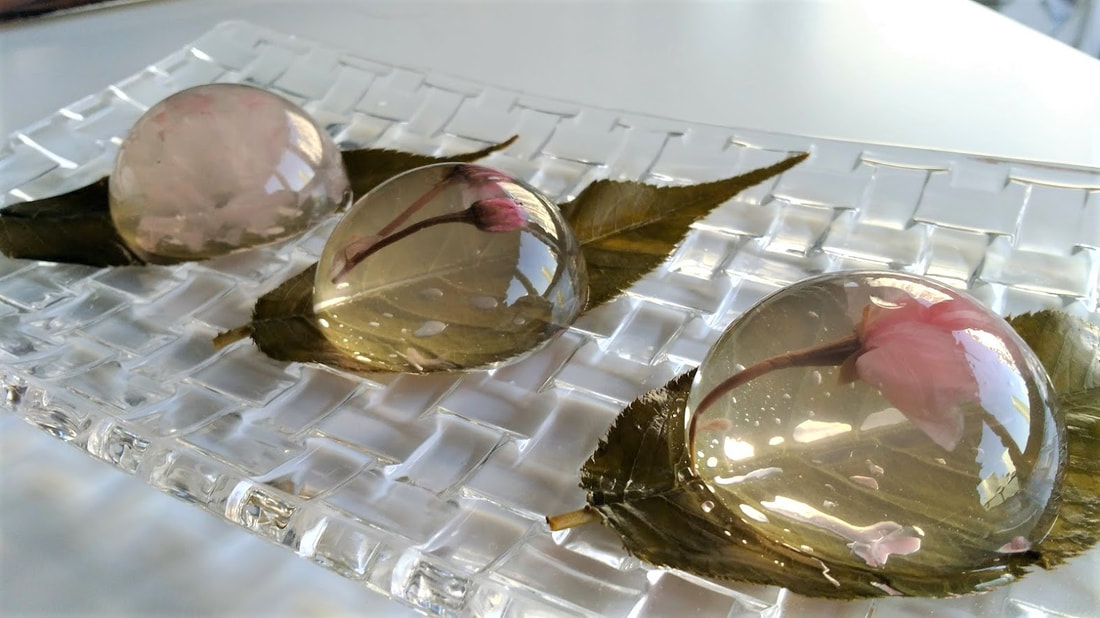
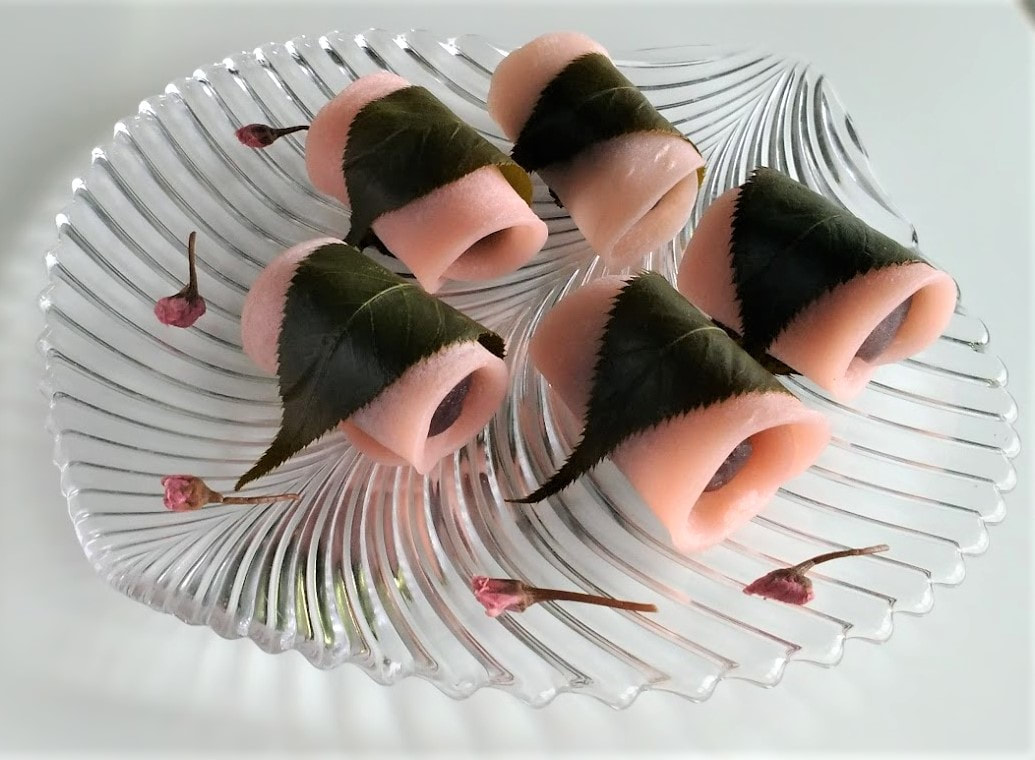
 Today was the 3rd class of my Nerikiri Basic Course. (I finally remembered to take photos). This class is for people who would like to learn the basic techniques of making nerikiri wagashi starting from the bean paste making. Today was the 3rd class and we made the spring motifs. The biggest difference between this class and the one-day class is that you will get a textbook with step by step tutorials for the motifs you will be making. This I hope will help you replicate the creations. For more details on this course, please visit this page. 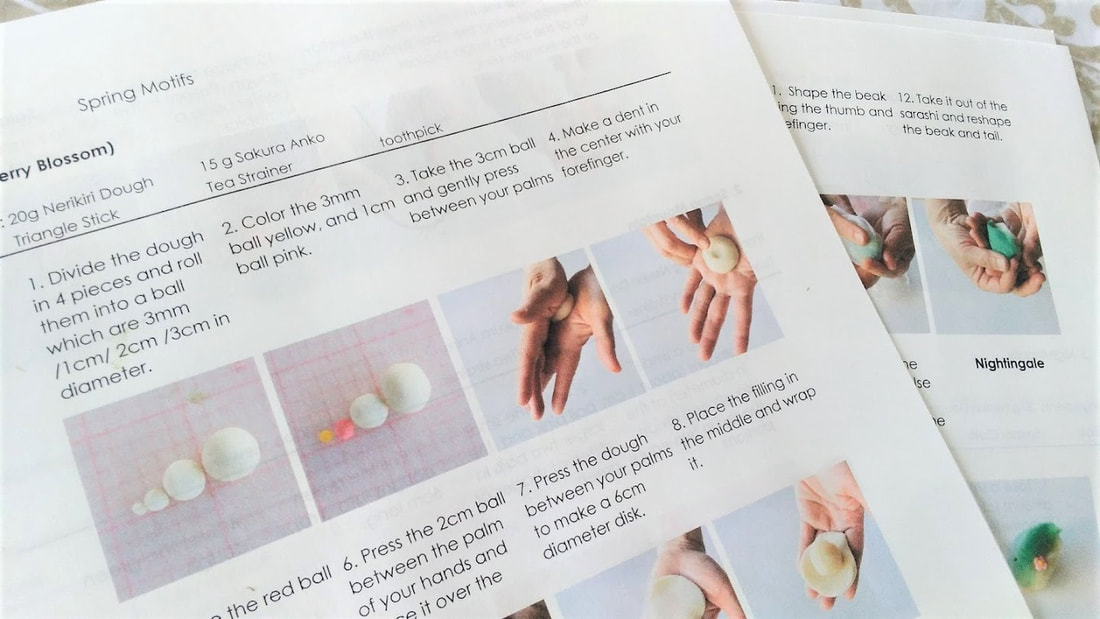 This is the textbook we will be using during class. 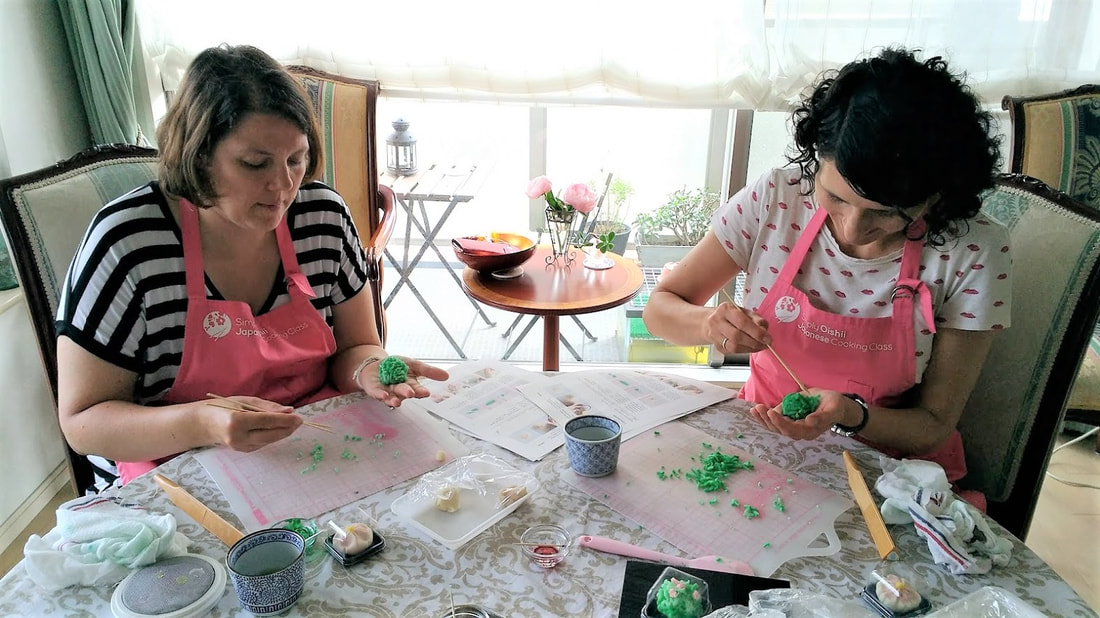 Learning to do the kinton 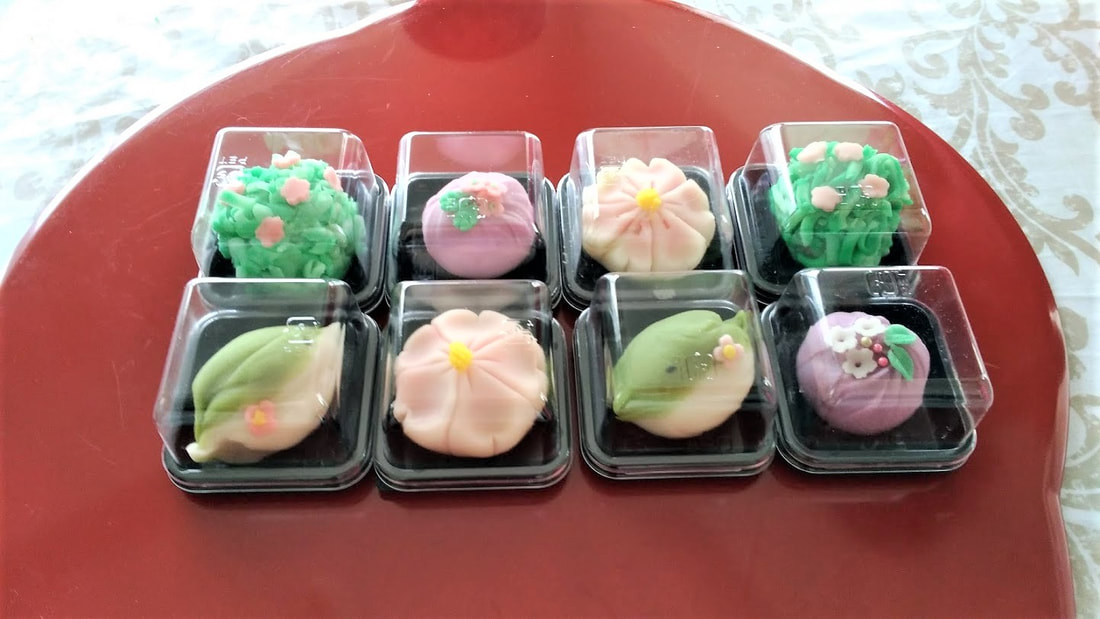 What we made in class today. Yesterday was a special request class to make mochi ice cream along with other mochi desserts. We started off with making matcha warabi mochi using tofu, then went on to make strawberry daifuku and ice cream mochi, and finished off by making mitarashi dango, which are mochi balls in skewers with a sweet soy sauce glaze. They are all mochi but the ingredients and their proportions are slightly different. The warabi mochi uses tofu and potato starch, the strawberry daifuku and mochi ice cream both uses glutinous rice flour (shiratamako) and sugar but in different proportions as the mochi for the ice cream must be soft even when it is refrigerated. Dango uses a mix of glutinous rice flour and joshinko which is a rice flour made with the Japanese short grain rice. The two rice flours have a different texture - glutinous rice being soft and the joshinko being chewy. I think I made too much considering the fact that the mochi ice cream cannot be taken home and should be eaten in class. But I think we all had a great time making lots of mochi. For mochi class requests, please contact me. 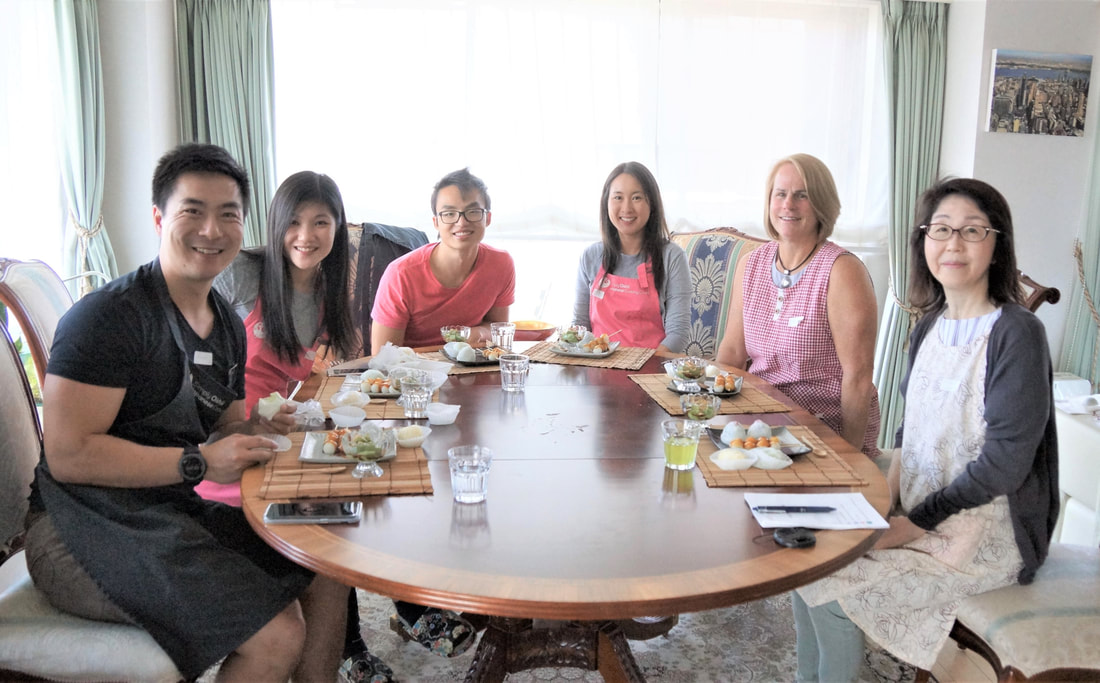 Guests from Australia! 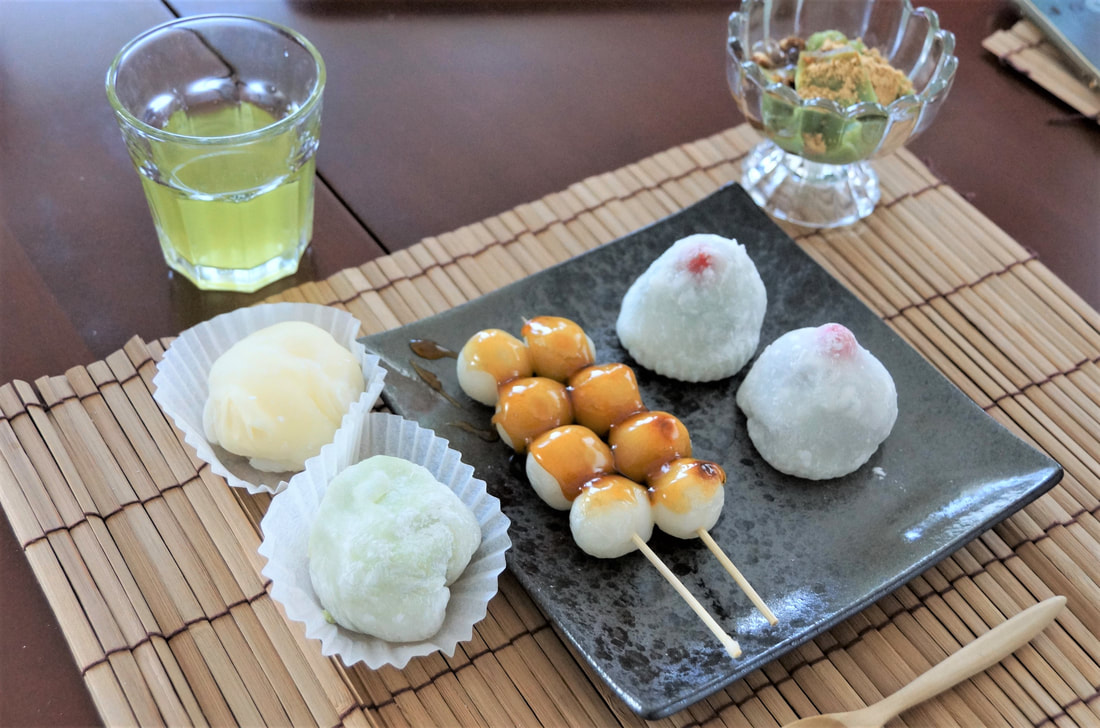 Our creations! 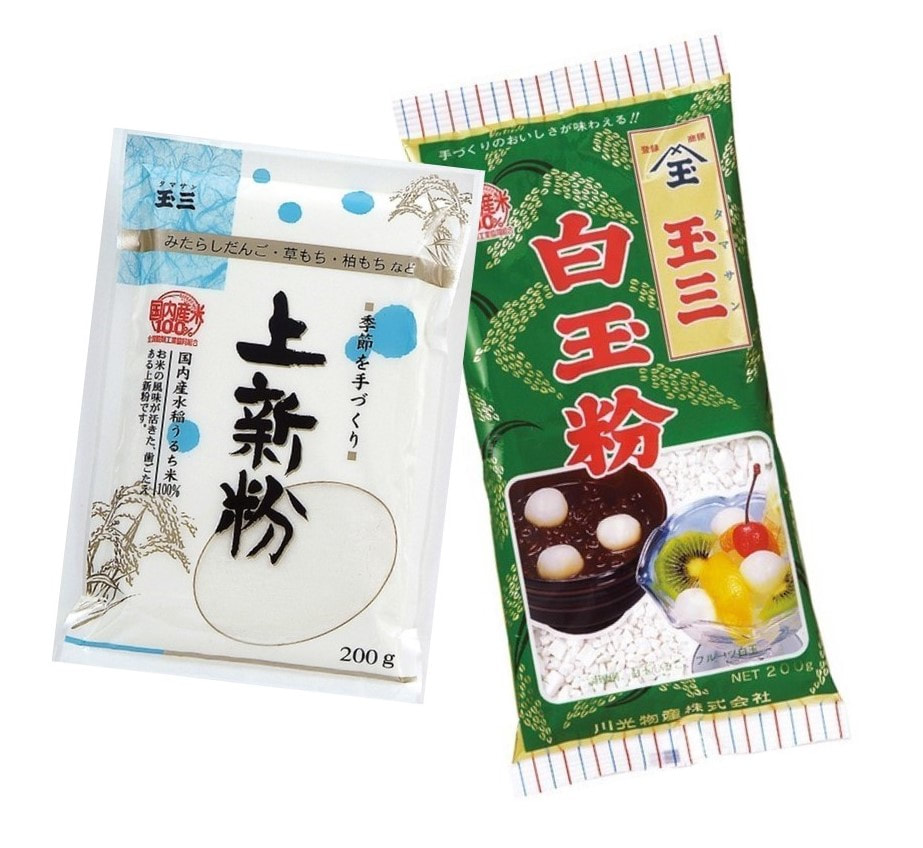 These are the flours used for making mochi. Joshinko (left) and shiratamako (right) Due to recent enquiries from chefs and restaurant owners who would like to learn the Japanese cuisine in depth, I've added a new course catered to learning popular Japanese dishes in short period of time. This course is suitable for professionals seeking to add a Japanese menu to their restaurant but do not have the time or budget to take a course in major cooking schools in Tokyo. The course will start with a supermarket tour to familiarize you with the Japanese ingredients and then go on to learning about proper table setting, food presentation (which will be touched upon throughout the course. The introductory class includes the basic skill to cook Japanese rice, make dashi (fish stock) and miso soup, and other dishes using the dashi. The other classes can be catered according to your request, but the basic curriculum will be provided to help you decide what you would like to learn. A shopping tour to the Kappa Bashi cooking utensil street and Tsukiji Fish Market can also be arranged as well. For more details on this course please visit this page. 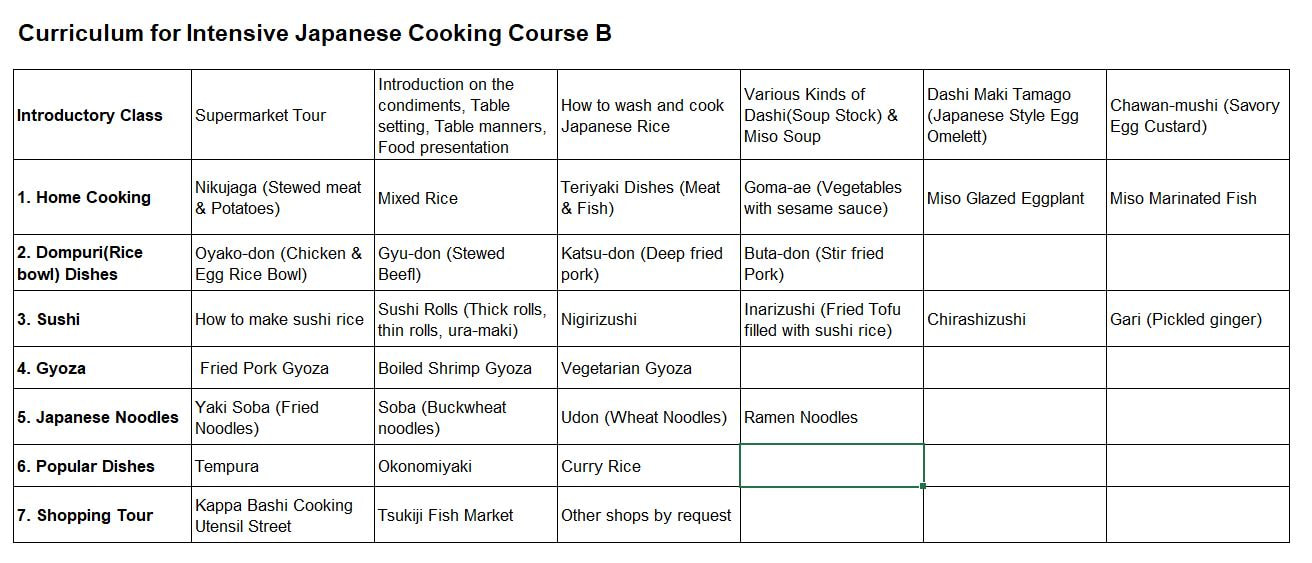 The sakura season which came a week early this year was an extremely busy period for me as my home sits in front of one of the most famous sakura gazing spots in Tokyo - the Meguro River. I'm not sure if people who book the class knew about it at the time of booking but I'm sure they enjoyed the special scenery when walking to class. 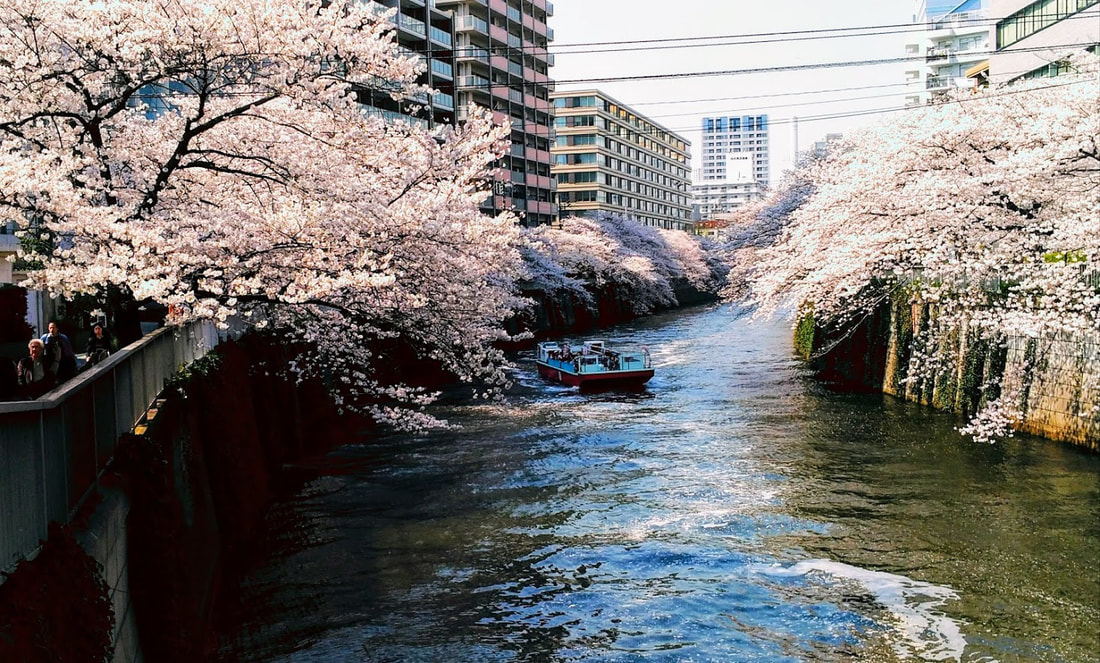 During this period, I welcomed a lovely couple from Malaysia who took the intensive home cooking course. This course is aimed at familiarizing yourself with the basic Japanese ingredients and learn the popular Japanese homestyle dishes in 5 classes. The first day started with a tour in a local supermarket then went on to a introctory class to prepare Japanese rice and dashi( soup stock). We also made a couple of dishes using the dashi After the introductory course, there are 4 other classes, Teriyaki class, Tofu Class, Miso Class and the last class can be chosen from all the courses I provide. Please see this page for more details on the Intensive Home Cooking Course. I have also added a new course, Intensive Japanese Cooking Course B for those chefs and restaurant owners who would like to learn Popular Japanese dishes in a cozy atmosphere and lower course fees compared to washoku schools. A few weeks ago, I organized a wagashi making birthday party for 10 year olds. The party was a great success and all the girls got to color their own wagashi and shape them into the spring motifs - sakura, butterfly, leaf with ladybug and spring flower. They did a beautiful job and it was great for me to watch them do it. Wagashi is a great activity to do at parties and workshops. For details on wagashi parties and other cooking parties, please see this page. 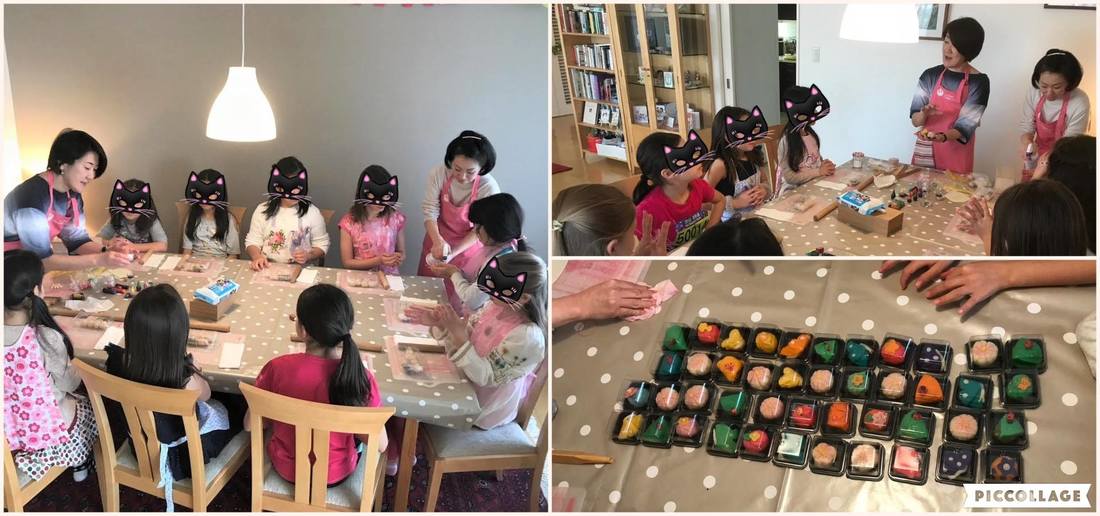 Spring break is finally over and the kids have returned to school. The new school year begins in April in Japan and not September. You would see the families attending the entrance ceremonies taking photos under a blooming cherry tree every year, but not this year as the cherry trees bloomed early this year and there are no more flowers left on the tree! But we did enjoy beautiful weather this year and the people who came to my class in the last week of March enjoyed the beautiful sakura in full bloom along the Meguro River which runs in front of our apartment. The sakura season had been a busy period for me doing 13 classes in 2 weeks. It was great to meet so many people at my home. It's back to normal this week and I am taking it easy. I will be updating this blog to tell more about the classes we've done. Time Out Magazine Tokyo Spring Issue is out now and they are doing a Cute Tokyo article. My wagashi class is featured in one of the pages, so if you happen to pick up a copy, please check it out! #timeoutmagazine #wagashischool #cookingclasstokyo #wagashi #nerikiri #cutetokyo #kawaii 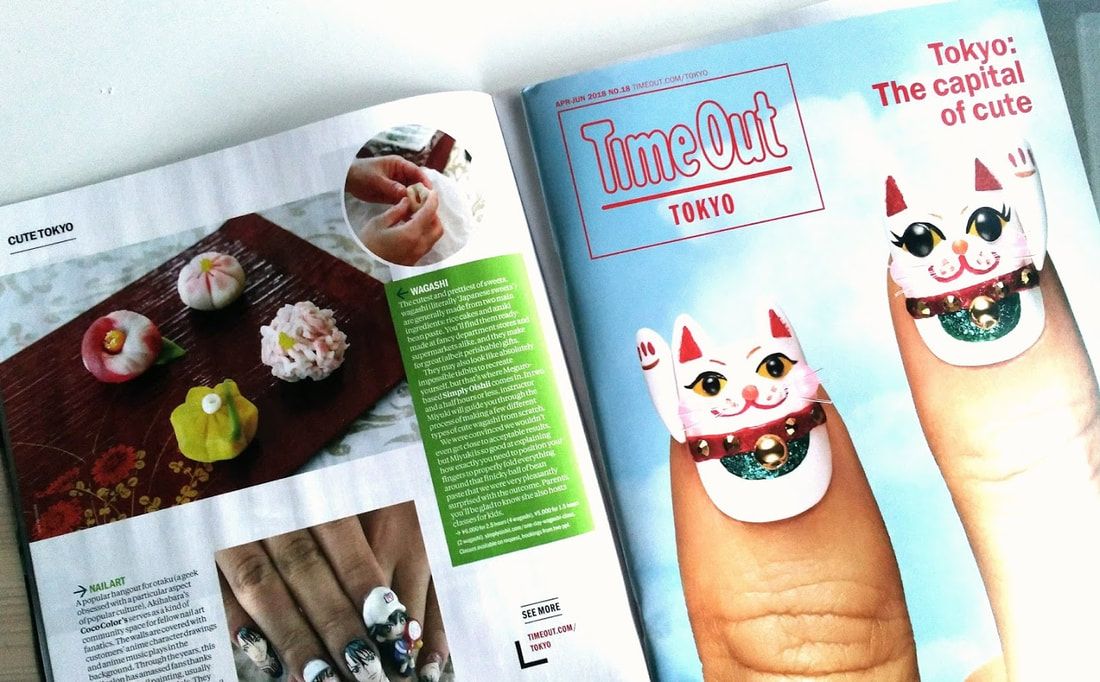 Yes, it's almost that time of the year when the Japanese go crazy over sakura, the cherry blossom. If you walk into a supermarket or convenience store, you'll notice sakura latte, sakura labelled beer, sakura cookie, sakura wine, sakura dessert, sakura ice cream and so on. I'm no exception and I can't resist making sakura sweets this time of the year. I just love the sakura scent which actually comes from the leaves and not the blossom. You can make sakura sweets using the sakura blossoms that are preserved in salt, or use the freeze dried flakes.
Those of you who have experience in cooking Japanese cuisine may be familiar with a popular condiment, mirin. Mirin is a sweet rice wine made with glutinous rice. It has been around from the 15th century and consumed as a luxury sweet wine among women in the Edo period. Nowadays, mirin is mainly used for cooking but a good quality mirin is also nice to drink on its own. Along with soy sauce, sake, and miso, mirin is one of the standard condiment that most homes would have in the cupboard. The role that mirin plays in Japanese cooking is very diverse.
If you would like to use mirin as a sweetener, just boil the mirin down to half the quantity until you get a syrupy consistency and keep it in a clean jar. This is called Nikiri Mirin (Boiled down Mirin) The alcohol has burned off, so you can use it for children too. It is advisable to use a good quality mirin (usually darker in color) for this. For more info on mirin, please visit, Mikawa Mirin's website.  |

AuthorI'm Miyuki and I teach Japanese Home cooking at my home in Tokyo. Archives
February 2021
Categories
All
|
 RSS Feed
service |
Information |
© COPYRIGHT 2015. ALL RIGHTS RESERVED.
|